


I am going to show you how to make a file upload form in WordPress with this tutorial. Having an upload file form can be useful when you have a directory. Or just simply allowing your clients to upload pictures or files to your website.
First, you will need to be using WordPress. I recommend using WPForms it is my favorite form plugin. It has an easy drag and drop feature that is very easy to use and creates the exact form you need. For instance, when I have a contest for our calendar or looking for rescue stories I use an upload form. I absolutely love this feature and thought I would share how easy it is to actually set one up. You can download and learn more about the WPForms Plugin from the banner below.
*Disclosure: I only recommend products I would use myself and all opinions expressed here are our own. This post may contain affiliate links that at no additional cost to you, I may earn a small commission. Read full privacy policy here.“

When I first started blogging this was one of my biggest questions since I wanted my audience a chance to share photos on my website:
Table of Contents
How to Make a File Upload Form in WordPress
Fields
Start by activating your WPForm plugin. Once you have the plugin installed you will then start by creating your form.
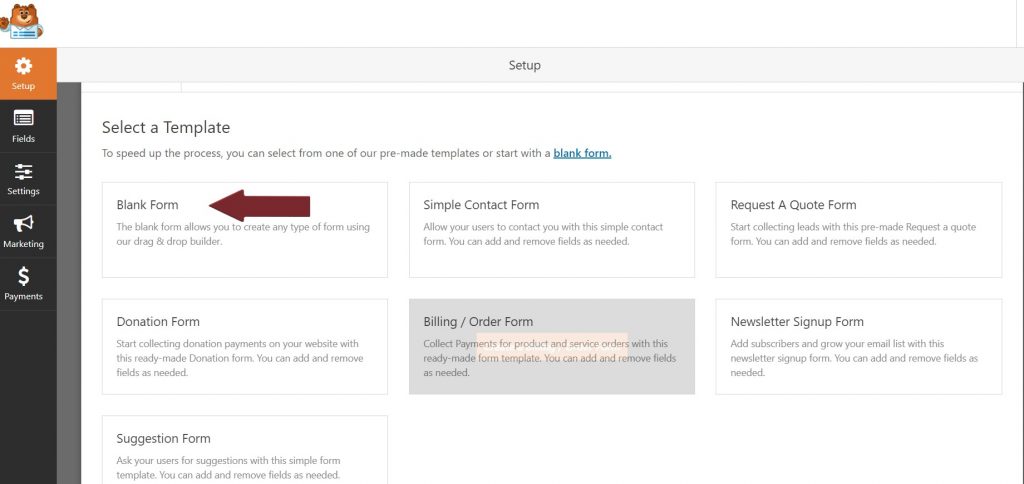
Once you have created a new form I used the title of the form “Example of Upload Form” You can name it anything you would like to such as submission form etc. Now you will need to start building your form.
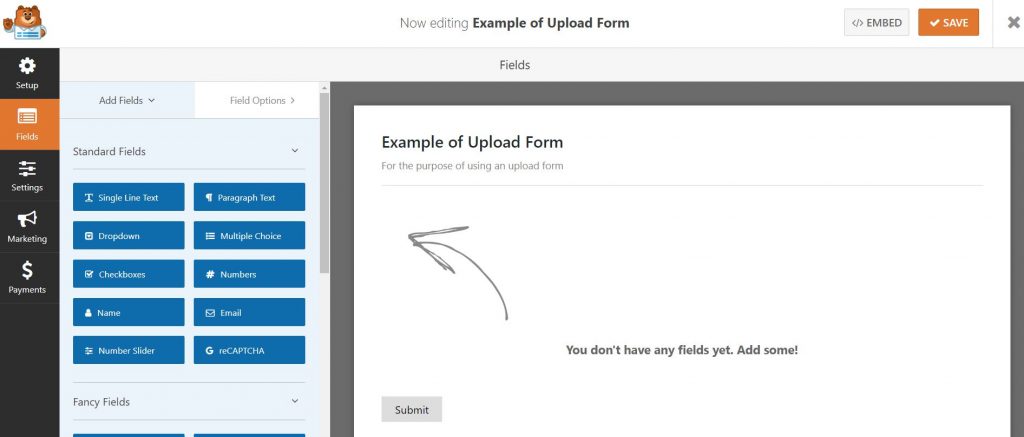
Now start adding your fields. Like Name, Email, and Website for instance of the person that is submitting an item on your website or a picture if they are doing a submission.
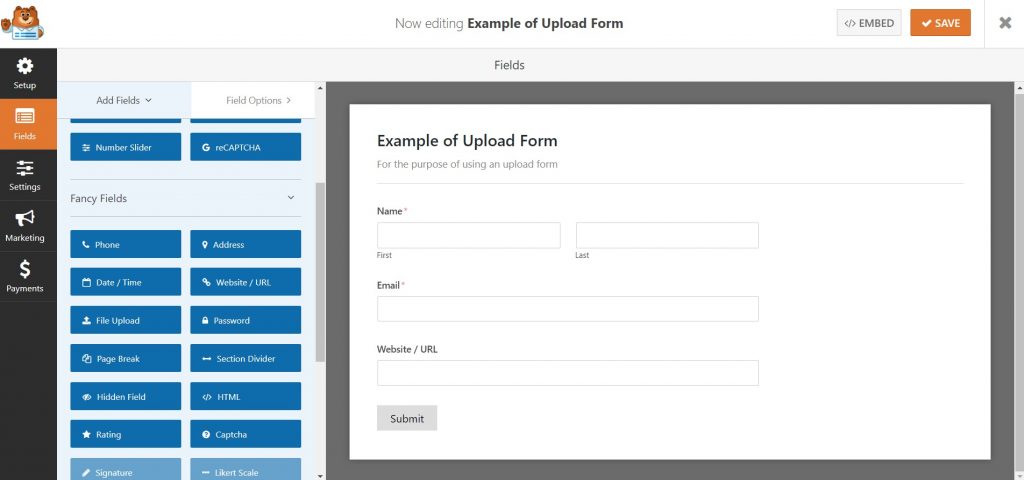
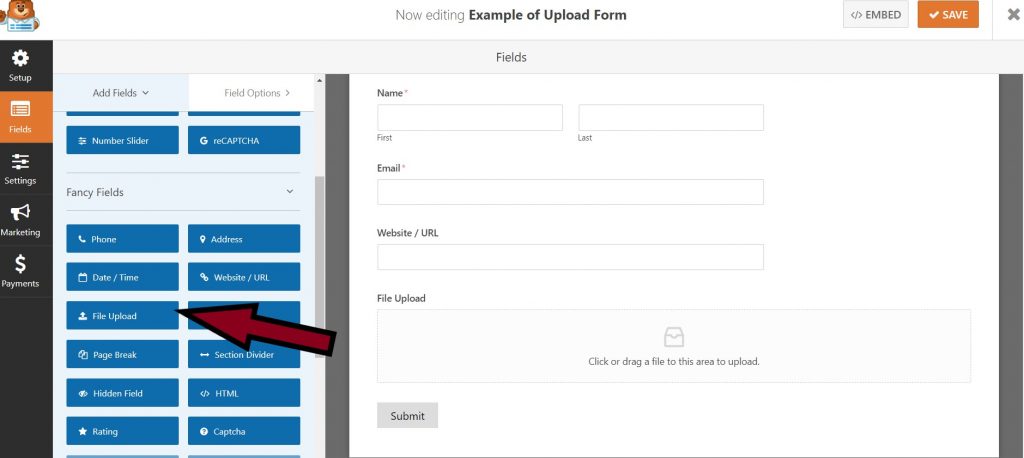
Now you can add the upload button. After you have completed this step I will walk you through the settings and provide you with a small video to use as a reference.
Settings For Your File Upload Form
Now you can start using the settings to set up how your form will respond when someone uploads a picture or file. You will need to upgrade to the basic package to be able to use this feature. If you’re using the free version you won’t be able to use this feature. I highly recommend upgrading to the minimum of the basic package. I have upgraded myself and I absolutely love this feature and use it quite often on my own website forms.
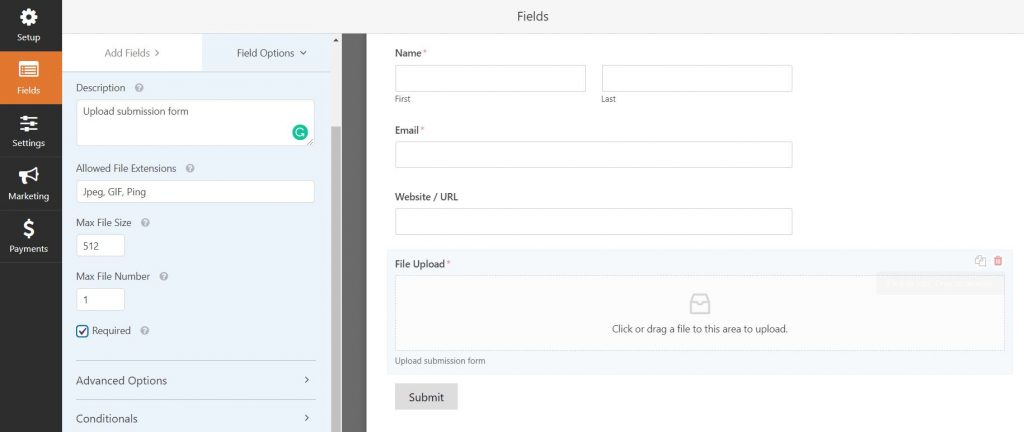
Description – Make sure you write a description so that your customer or client knows what the form is for.
Extensions– Make sure you separate any extensions you accept with a comma. For example JPEG, PING, GIF, etc.
Max File Size– The form will allow up to 512MB file size. You can accept lower than 512MB of any size.
Max File Number– Enter the number of uploads you will accept. You can choose as many as you like. I use only 1 or 2 for most of mine.
Required– You can choose this option if it is required. In other words, you can make that mandatory or not.
Advanced Settings in your upload form
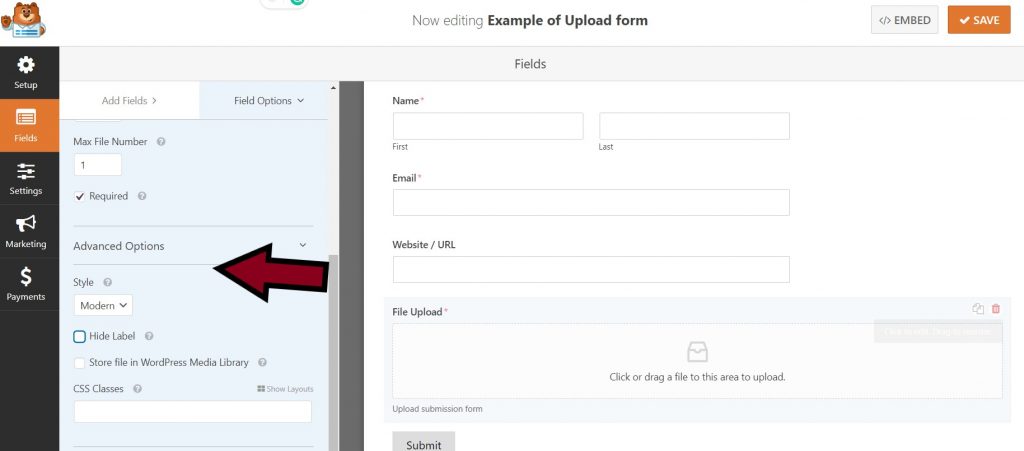
Modern Style supports more than one image. Classic supports only one file upload.
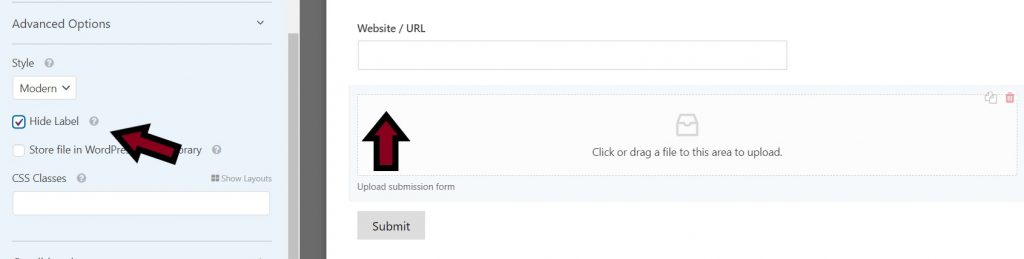
By clicking on Hide Label it will hide the label title on the upload block. For the example above you will notice it will say File Upload if I click the box that title disappears.
Below this, you will see a box that will allow you to store the files in your WordPress Media Library rather than the upload form file on your website. You can also add in your CSS class information.
Next, you will notice the conditional logic box. With a Classic style Field Upload field, drag a Dropdown field from the left-hand panel to your form, just above the file upload field. This way you can add more than one. You can learn how to use the conditional logic field more on the WPForms website. You can add new fields by clicking the Add new group button, which applies the OR logic.
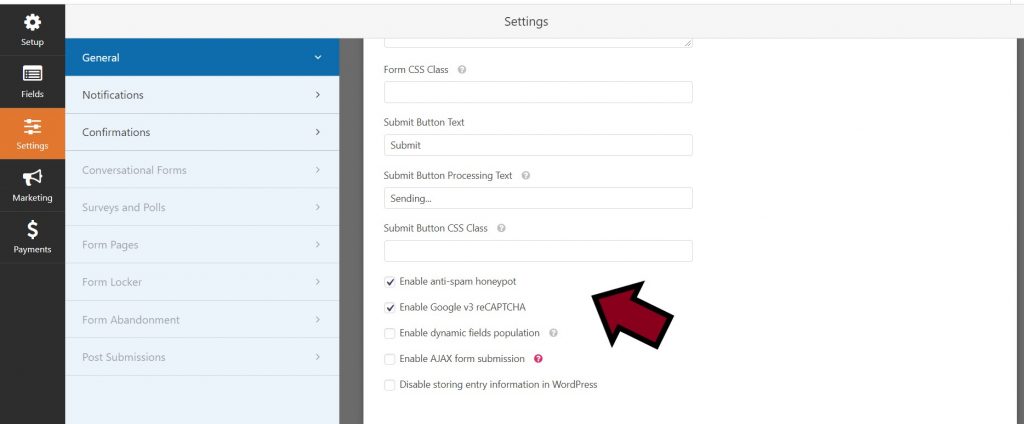
General Form Settings
You can name your form with these settings with a description of what the form is for. Also, you will notice that you can enable google V3 reCaptcha and honeypot as well for protection from spam.
Notifications
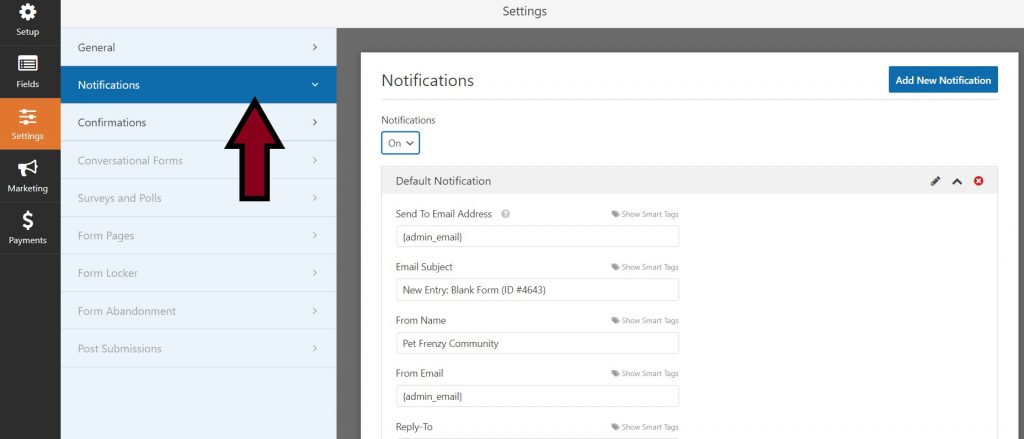
You can choose whether this is enabled or not. I would recommend setting this up so you do not miss any submissions. I will show you later on how to check for any entries or submissions. You can send it to your email or multiple emails when you separate them with commas.
Choose the subject that you will recognize which form submission this was from. You can also add in the From and From Email. As well as the reply-to field. In the message box, you can use the smart tag {all_fields}. This will display all the form fields in your email notification. Again you can also add in the conditional logic you choose to better organize and manage your forms and submissions.
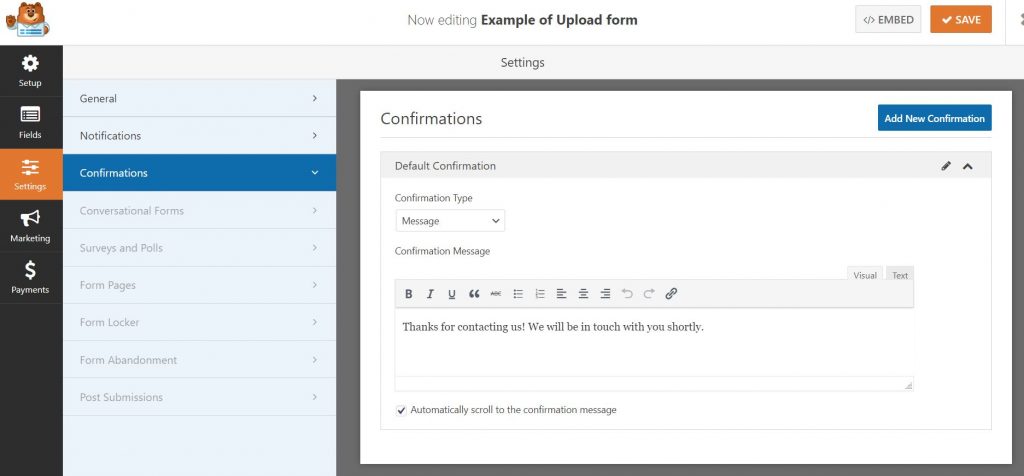
Confirmations
Here is a screenshot of the default settings by message in your form.

First is the Message, you can use the default provided or you can type in your own message for the confirmation that will be shown to the customer or client.
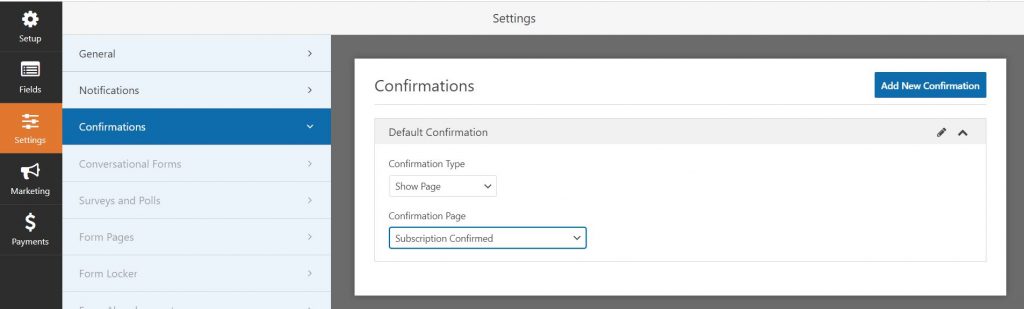
The second is a confirmation page that the client or customer will be directed to. This is what that would look like; You can create a specific page like I have called the submission page that the client will be redirected to.
Your third option is another website URL. You will then include the page you want the client to be redirected to. This is what that would look like. Furthermore, I must remind you not to forget to save your form.
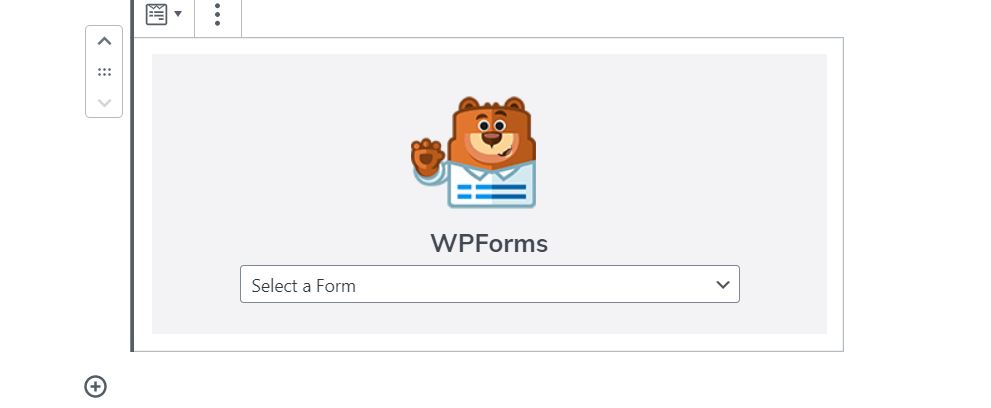
To add your form to a page on your website you can use the embed feature or directly add the form to a page using the widget option. You can also search for WPForms. Choose that widget and add it to your page. It will look like this once you add it to your chosen page.
Now you have created a file upload form to your website. If you want to check to see if anyone has uploaded or sent in a submission you can always go to WPFroms and go to the Entries. The screen will look something like this:

You will notice the forms below, just click on the New ones to view them. And you will get the time and date of submission as well. It is a great idea to check these once in a while for any followups needed.
Review Video On How to Make a File Upload Form in WordPress