Table of Contents
How to create pages and posts in WordPress for beginners
Create Pages And Posts In WordPress are very different. You can create a page for your legal terms and conditions and you can create a contact page. You create a post when you’re discussing a certain topic or doing a review.
Install Grammarly
The first thing I highly recommend is to sign up for Grammarly. It will help you proofread and fix any mistakes as you go along. I swear by this program. It can save you time and money when creating your first blog post. I absolutely love Grammarly.
It only takes a moment to sign up and get started. This way even when you’re communicating through email. You can be sure your grammar is correct and professional. I am in the Grammarly Affiliate Program and may receive a commission if you sign up. There is a free version available for you as well. I again highly recommend this if you’re going to start writing. I can not imagine writing without it.
Posts
Posts are chronological and they were designed as a blogging platform. Visitors will always see the most recent posts when they go to your blog. You can go to the reading settings in your settings on the sidebar. You can change them to showing however posts you want. I wouldn’t recommend more than 10. For each article, I recommend a summary.
Posts can be put into categories or tagged. Pages cannot. Another great feature of Posts is the Excerpts. Excerpts are short summaries of a post you can create. That will be explained in my other post. Posts are what you want your readers to see.
Adding A New Post
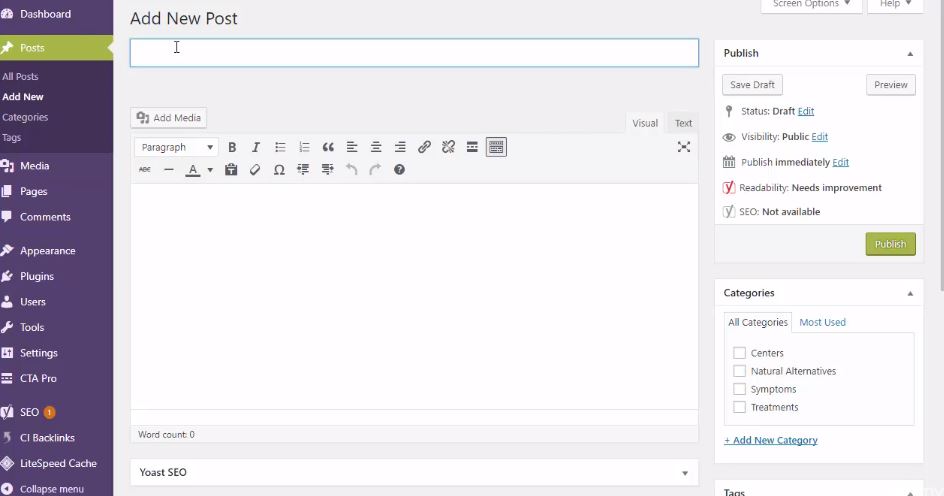
Go to your sidebar and click on posts, add new. You will also want to create a category if you haven’t already. You will need to read Creating Tags and Catagories in WordPress. This is important as it will keep your link structure clean and easy for search engines to crawl. You want anything related in that category to show up in search results as well.
Choosing A Title
Choosing a title is important. You want your title to be your long-tailed keyword if possible. This can help get your blog post in the top google search results. Plan your title to reflect what you’re writing about.
Once you have written your post you will notice the sidebar. You can add a featured photo on your post. Add your category you would like your post to be under. Include only one to three tags you want to use for your post. This page also gives you the option to add a new category. Remember you will need to go back to the categories and make sure your Yoast SEO is giving you all the green lights.
Now you will want to check your Yoast SEO on your post.
Focus Keyphrase
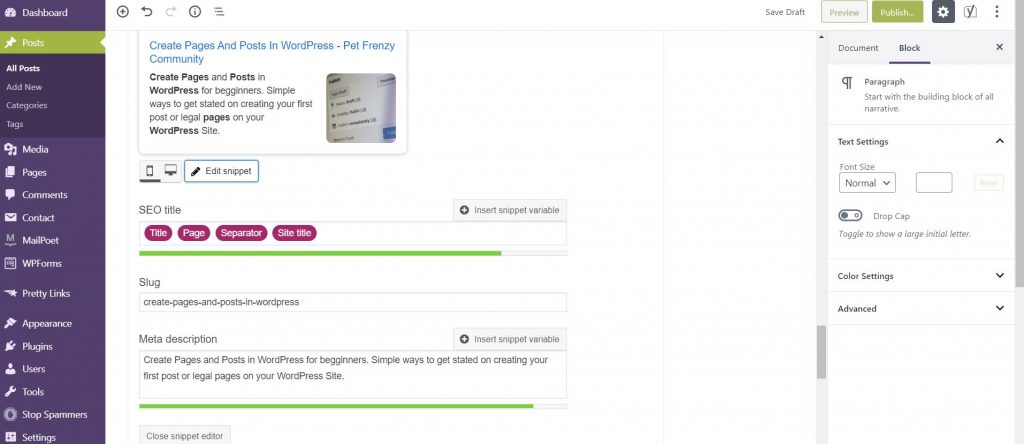
You can learn more about choosing the right focus keyphrase on Yoast. I use the exact title sometimes because I do tend to use longer keyphrases called long-tailed keywords. Notice the Snippet Preview on the bottom and open that up to make sure you have a description of your post in this part. This is what it will look like on a search page like google.
Use your focus keyphrase to start the sentence and use words that will intrigue people to click on your past. Close the snippet after your meta description is green and says it matches the Focus Keyphrase. This is an example from the article your reading.
Excerpt
You do have the option of putting in an excerpt. This will be the description of your post. Some themes automatically grab the first paragraph of your post. However, if you would like a different description than making sure to add in an excerpt is essential.
Images
You can download a plugin called Smush. It will help you condense your images to a more web-friendly format. This can increase your site’s performance and speed. When you place your images in the post or set your featured image. I suggest adding the Alt Text and description into the image properties. You can do so very easily in WP.
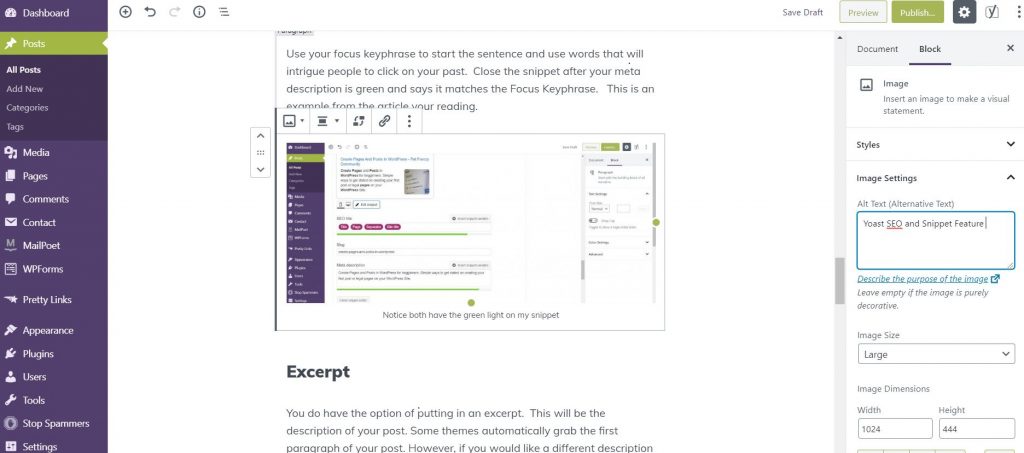
The reason you want to do this is so that when someone is searching your image through text or voice they can find your website. I explain that in more detail in my other posts. It is a great habit to get into or you will find yourself fixing hundreds of photos later. Consider adding in a lightbox plugin. This will allow the user to click on your image to increase its size. I am still in the process of adding this to all my pictures.
Headings are Important
Make sure you click on the i with a circle around it to check your heading structure and word count. You will want at least 1000-1200 words. Consider the heading structure especially because the search engines rely on these headings. You can also use them to jump to specific pages and posts once set up correctly.
Now you can publish your post. Or you can schedule your post to be published at a later date. Make sure your SEO is all good.
Creating a Page

You can create pages for specific products or services. It is the same thing as creating a post. I would recommend thinking out your pages and keeping your posts related to those specific. I use mine for specific ones I don’t need the search engines to follow.
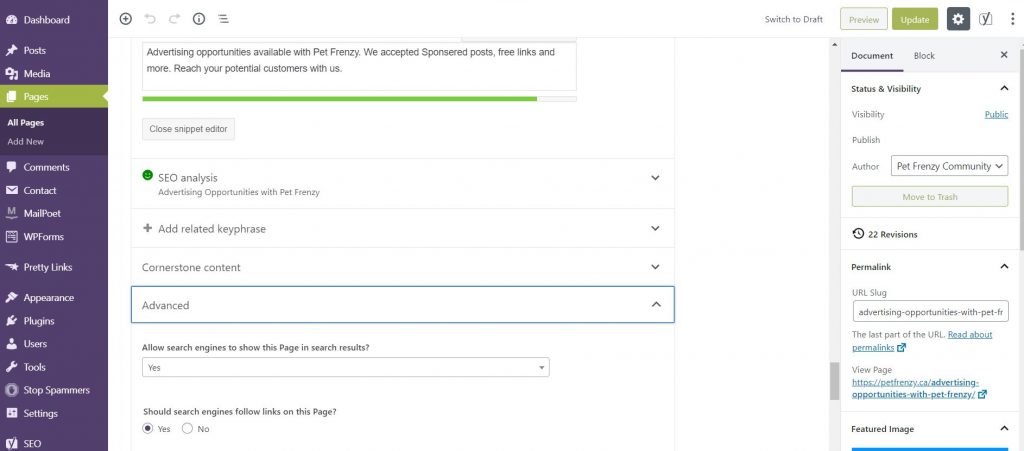
You can change them individually if you choose them to be found in search results. For example on my Advertising with Pet Frenzy Page, I allow the search engines to index that specific page, but not my legal pages.
Setting Up Your Legal Pages
If you enjoyed this blog on how to create pages and posts in WordPress. I highly recommend you read the post on Creating Your Legal Pages in WordPress. I also have a great article on setting up Yoast in WordPress.
And remember to sign up with Grammarly. It can definitely help you become a better stronger blogger!! Check out the video below to explain how it works better.


