


I will show you how to collect PayPal payments on your WordPress site using these simple steps. As you already know, I am a huge fan of the WPForm plugin from my other posts. Using WPForms make it very easy if you are already familiar with the plugin. During this time we are seeing more and more businesses turning their stores into online stores.
Table of Contents
What you will need to collect PayPal payments
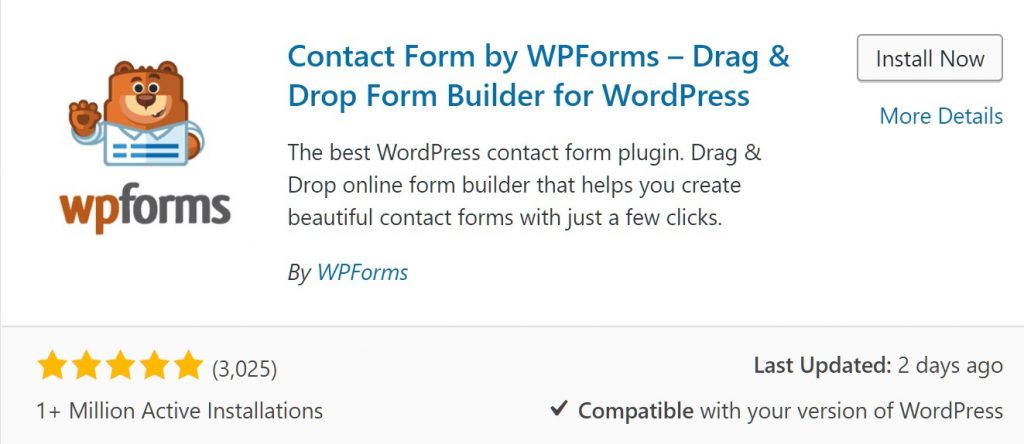
Make sure you have this installed before proceeding. Although, we recently had a giveaway for the Pro license and 3 lucky winners were chosen. You will need to purchase the pro license for using the Paypal add-on. If you haven’t already upgraded you can do so from the banner below.
Once you have completed this you will need to create your billing form to accept your PayPal payments. If you haven’t already set up a PayPal account you can do so on their website.
Getting Started With PayPal
According to Wikipedia ” PayPal was originally established by Max Levchin, Peter Thiel, and Luke Nosek in December 1998 as Confinity,[15] a company that developed security software for handheld devices.[16]”
Some of the benefits you can enjoy using PayPal:
- Very easy to send and receive money with a secure connection. This keeps everyone’s financial information private.
- You can change currencies for billing purposes. Fast and secure!
- Fees are fair and free in the US
How many people use PayPal?
- PayPal currently has over 286 million active users! (Source: Statista)
- 87.5% of online buyers use PayPal (Source: Buildyourdream)
- According to the Wall Street Journal, PayPal is the 21st largest bank in the USA
- According to a recent study, the average American has nearly $500 in their PayPal account, while their physical wallet holds $196 in cash. 20% of those involved in the study said they prefer keeping money on PayPal to keeping it in a regular bank account. (Source: Statista)
As you can see it is a very trusted merchant service online. So let’s get started!
*Disclosure: I only recommend products I would use myself and all opinions expressed here are our own. This post may contain affiliate links that at no additional cost to you, I may earn a small commission. Read full privacy policy here.“
How to Collect Paypal Payments on Your WordPress Site
Using WPForms for billing and payments online

Once you have activated the WPForms plugin. You can easily activate the add on in the plugin settings. Because you will need WPForms pro feature to use the Paypal add-on. It is worth the investment to receive payments online for your products or services to your customers. As you can see from the stats above. Even if you have a simple ebook available for purchase you can use this amazing feature!
Step One
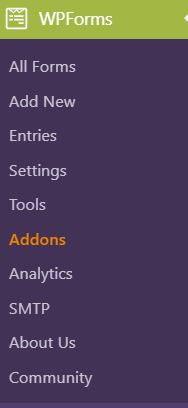
Go to WPForms/Addons/
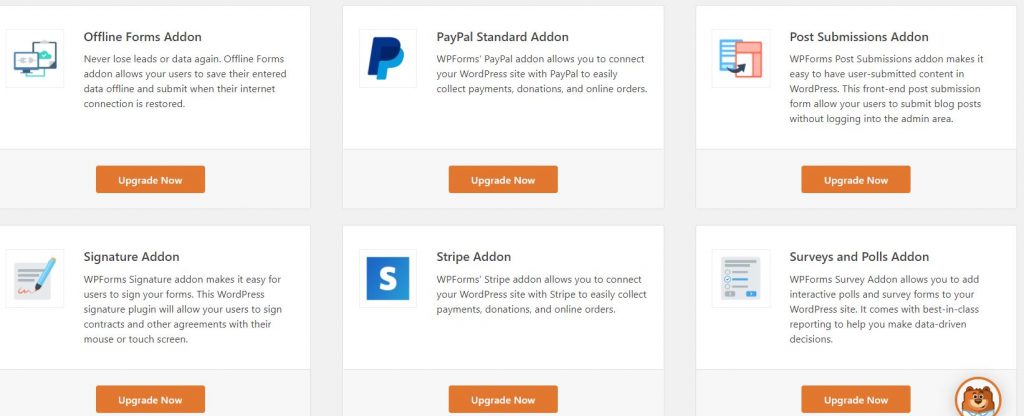
Choose the PayPal add on
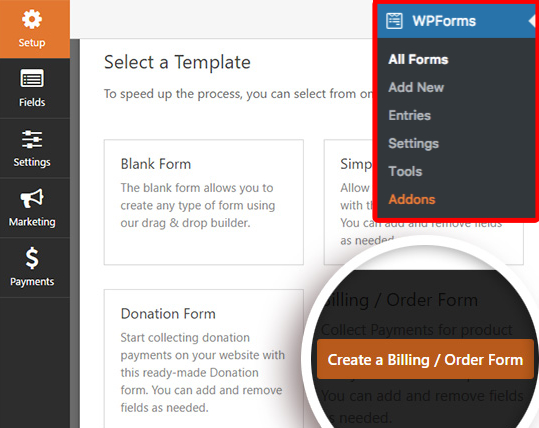
Create Your Billing Form in WPForms
Now that you have created your billing form, you can connect to PayPal from your Payments tab in WPForms.
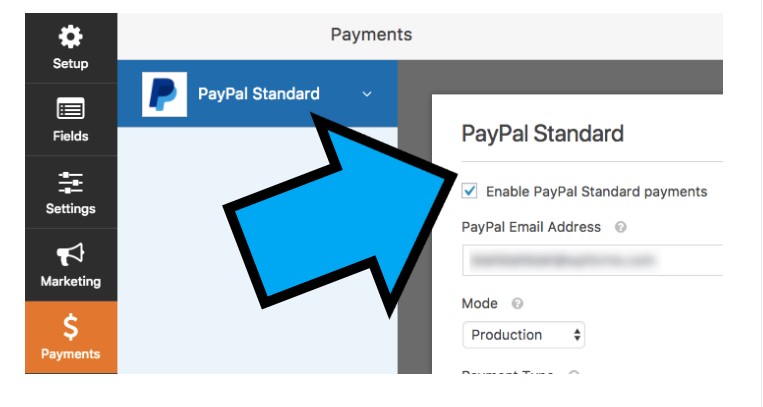
- You will need to fill in the PayPal email address: This would be the email for your PayPal account, where the payment will be sent.
- Mode your options are Production or Test/Sandbox You can read the tutorial for setting up a test payment page to ensure your form is working properly. I highly recommend this step in the process.
- Payment type that you accept: Donation or Products and Services.
- Cancel URL if the user does not complete the transaction they will be directed to an URL of your choice or again you can make your own in the WPForms settings.
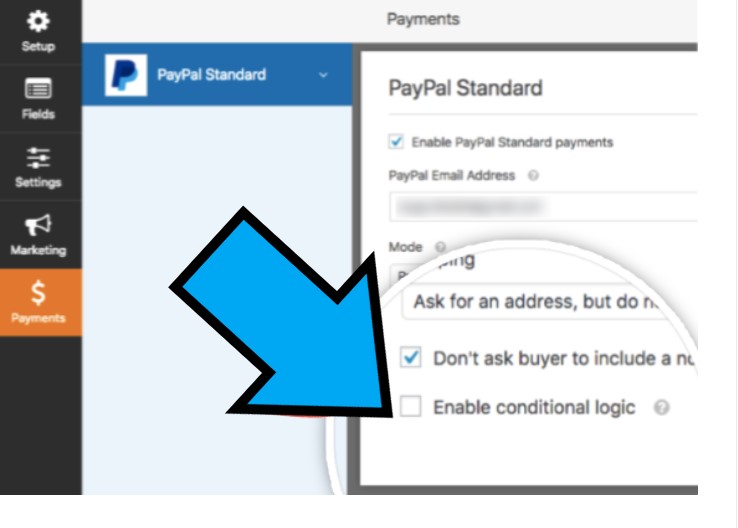
- Shipping options if you ship products to customers you can require an address field at the checkout.
- You will also see two more boxes to check, one is to Not include a note section for the customer and the other is to enable Conditional logic which I recommend if you have a workshop or want subscribers.

For example, if you want your customer to sign up for your newsletter before payment can be accepted, or you are allowing access to a workshop. You can then use these fields to do all the hard work of filtering for you.
- Process– this is what will happen if conditions are met to process or not to process.
- The Select Field – You can choose the field or question you would like to apply this rule to.
- Choose the type of Comparison you would like to use such as greater than or less than etc.
- Select Choice– This will determine the value you would like to contain in order for any conditions to apply to the sale.
Here is an example of one already set up:
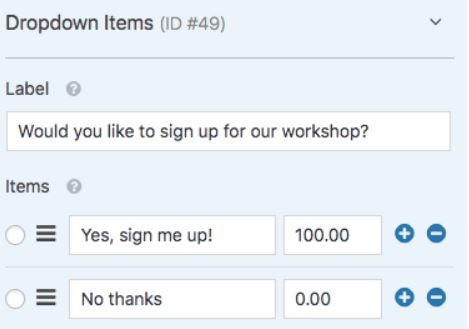

This shows that payment will only be processed if they choose to sign up for your workshop in the example. When they do not sign up, then they will not go to the PayPal page.
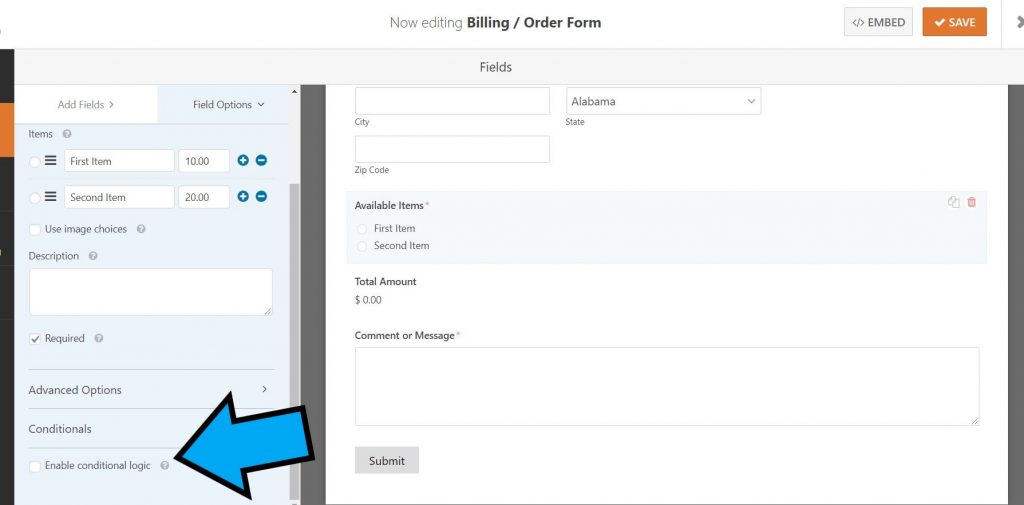
If your not using the conditional logic
Let’s say you choose not to use the conditional logic in your form. You can always check this box on in your form anytime. (If you ever want to add some conditions to your form at a future date. )
When your done you can enter the item information and pricing into your form. Your form will look similar to this one below:
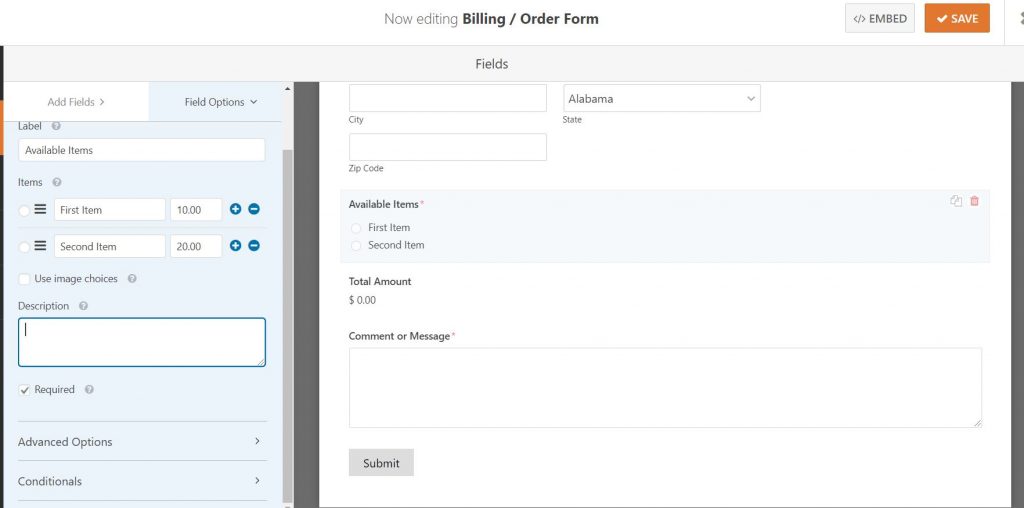
Now you are ready to save your form and place into the post or page of your choice. I do suggest doing a test payment page upon publishing or just before you are about to publish. You can learn how to do a test page with PayPal below:
Run a Test Payment Page
It is important to run a test page. You will need to go back into your PayPal account and go to the developer’s page. You can use your PayPal login to login to the Developers page.
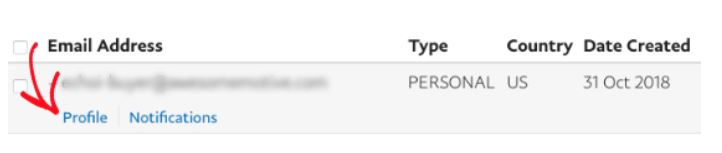
Once you have successfully logged in, go to the Sandbox section in the left menu and click Accounts.
PayPal will have already created two test accounts for you: One for business the other one for Personal. You will now have to create a password for this test page. This is so that you can log in with this account later for test payment. To do this, click on the Personal test email, then click on Profile.
The Personal test profile will be automatically created for you. Next, click Change Password and enter a password you’ll be able to remember later. Now you can create your test form in WPforms to make sure it is all working correctly.
Creating Your Test Form
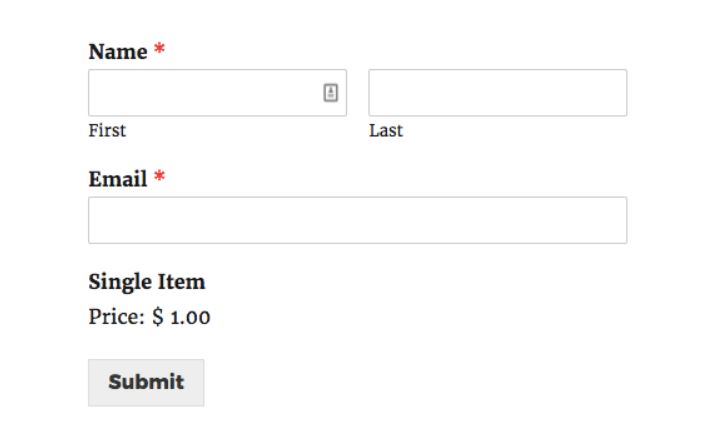
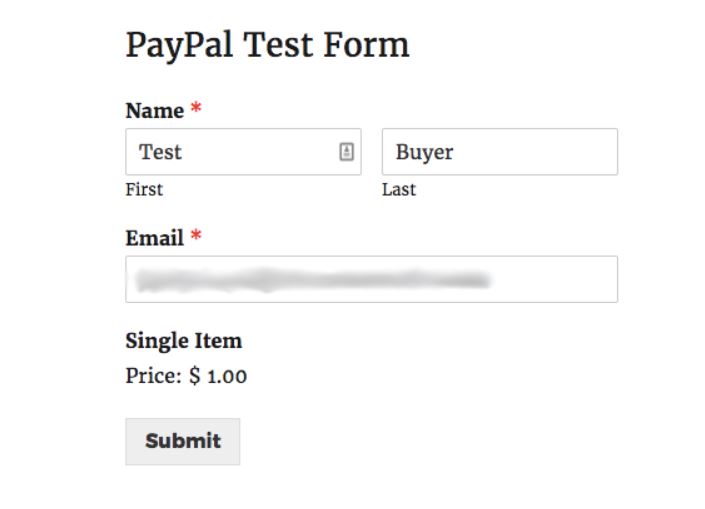
Add the following fields to the form: Name, Email, and Single Item.
To add a price to the item, open the form builder, and click the Single Item field to open the Field Options screen. Enter a dollar value under Item Price. We will just use $1.00 for the test.
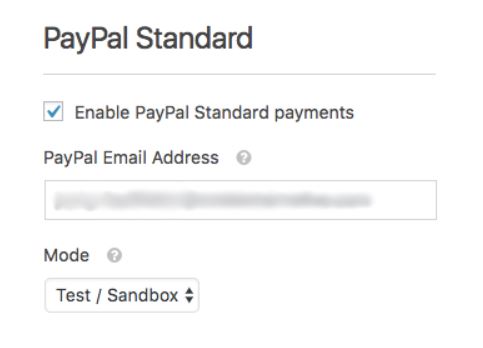
You now need to go to the Payments tab and this click on PayPal Standard to display PayPal settings.
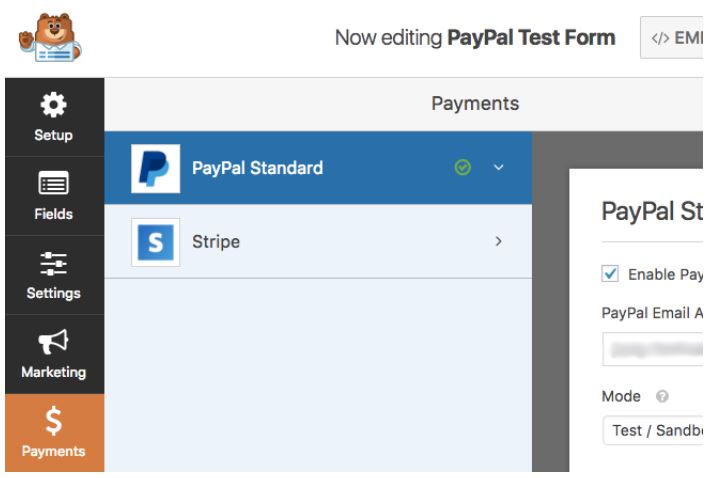
Under PayPal Email Address, you should then enter the test Business email listed on your PayPal Sandbox page when we created the profile settings.
Set the Mode to Test/Sandbox. Don’t forget to save your form.
Final Step
Go to your WordPress dashboard and create a post or page and insert your Test form. You can password protect this page you created so that it won’t be published in your latest posts. Unless you have a page already to insert your replacement form once the test is completed. Once published you or in preview you can test your form.
Fill out the form with the Personal test email listed on your PayPal Sandbox page.
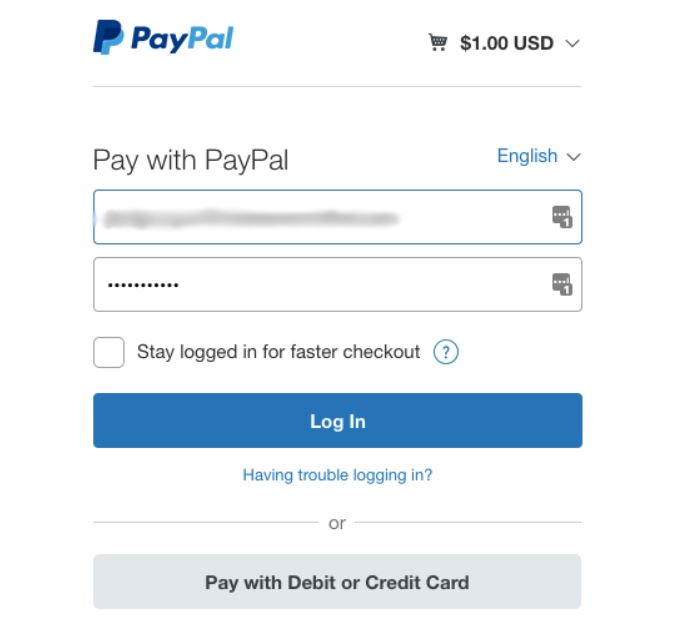
Once you have submitted the form, you will be redirected to PayPal’s site. YOU NEED TO log in using the same Personal test email you entered in the form as well as the password you set for that profile earlier. Also, avoid entering login details again in a couple of steps, you can check the Stay logged in for faster checkout option.
Go to the Order Summary page. Check that the total matches what was listed in the form, then click the Pay Now button.
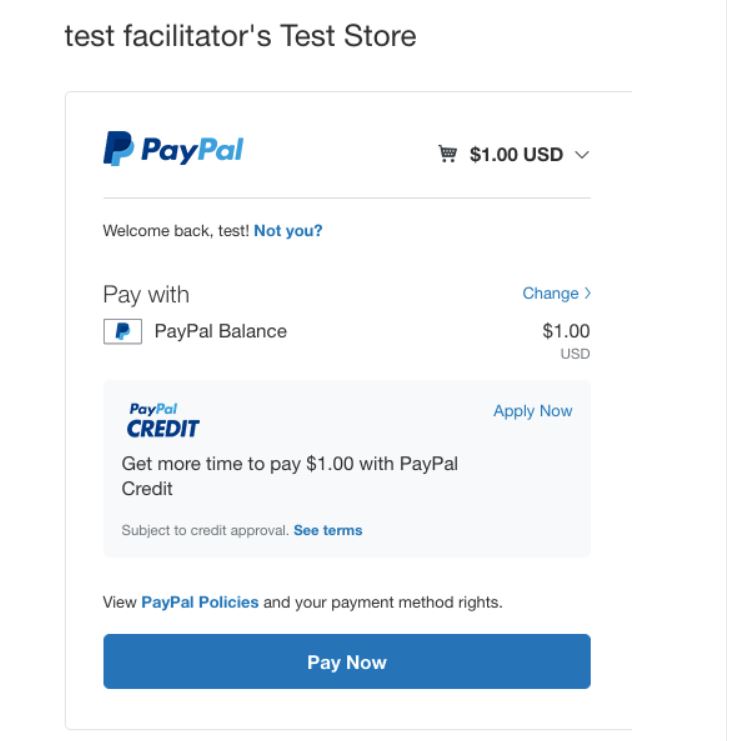
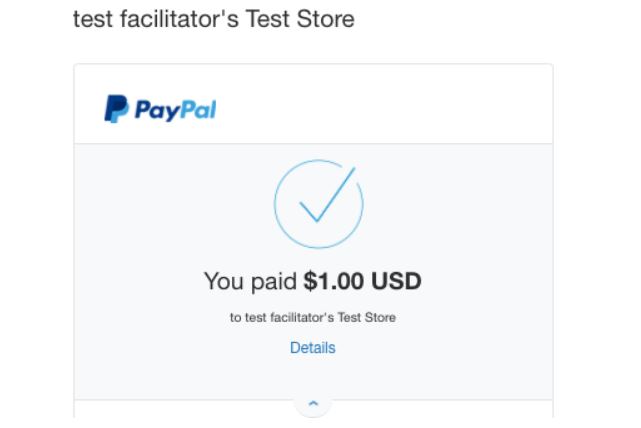
Now that you have successfully completed your payment. Check the order displays on your personal test account. You can do this by going back into the Sandbox Test Account on the Developer site. You can also see the receipt from your test transaction by clicking on Notifications in the Personal Test email.
I hope this page will help you accept payments you never had before! After all there may be 286 million new customers waiting for you! If you have any questions I would be more than happy to answer them below.

Pet Frenzy is affiliated with WPForms and may receive a commission on your purchase. Please read our site-wide disclaimer below. We value everyone that helps us keep our site going whether it be by commissions, follows, or shares!