


Learning How To Use WordPress
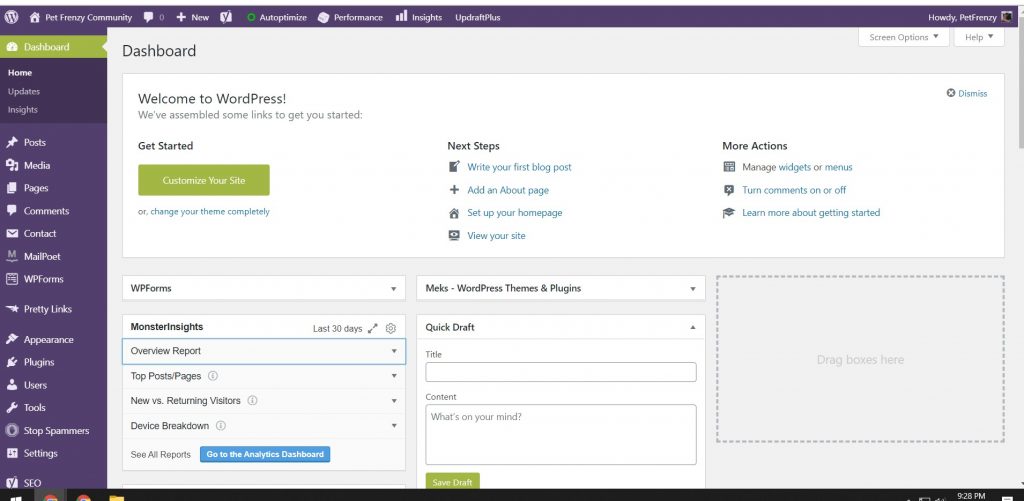
Learning to use WordPress for newbies is easier than it may look. Now that you have your WordPress dashboard ready to use. This is where you can start to build your website. You can read the previous article if you want to set up from scratch. Getting Started As A Pet Blogger. I also recently was sent a good article from Digital.com. For those that have an existing business and/or want to move forward online. How to take your small business online!
There are three main areas to the dashboard. The top of your WordPress is called an admin bar. You also have a sidebar. The large window on the right is your work area.
Two Ways To Edit Your Website
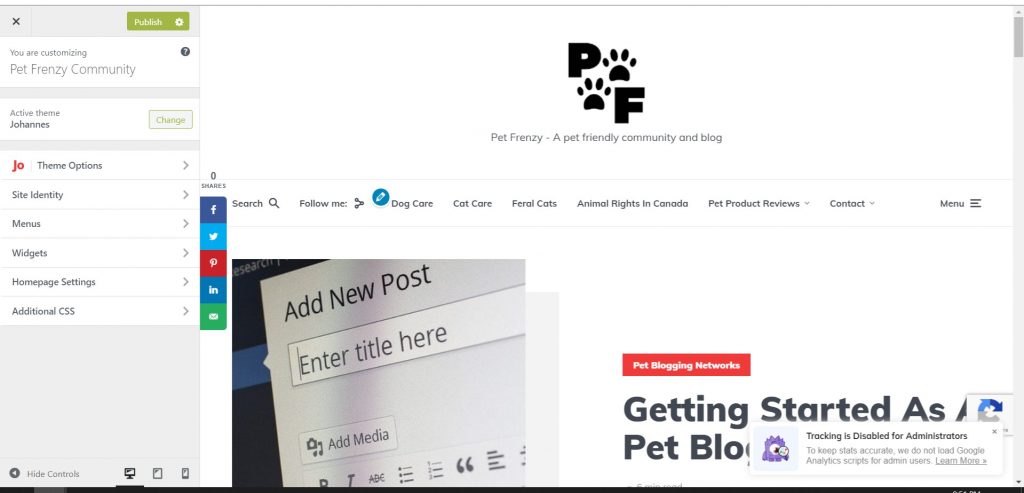
You can view your website from the admin bar at the top. You will notice when you view your site you customize from that page as well. Here is an example when you visit your site and then select customize.
WordPress Settings
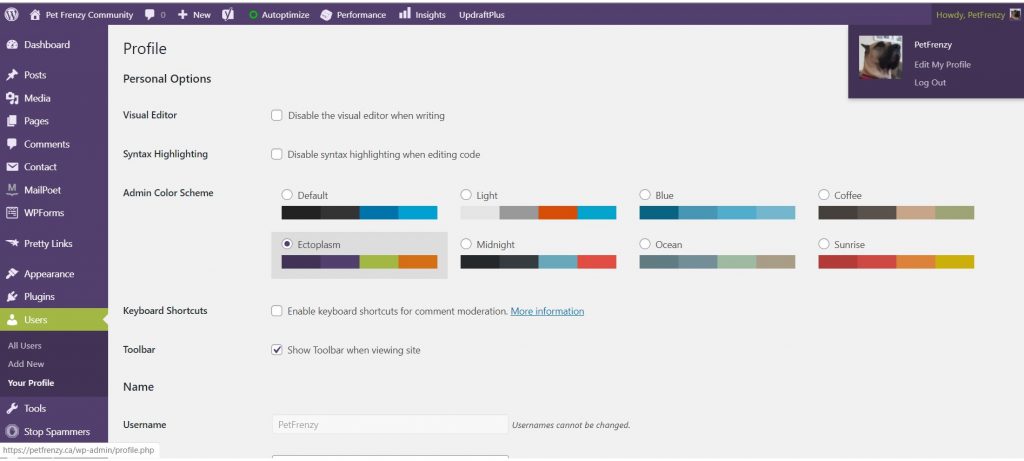
Again your site may not look like this as you most likely have no content yet. So what you can do is go back to your dashboard. You will see in the top left corner your profile. Click on Profile and change the settings. I have my dashboard set to purple. You can go through each setting one at a time.
Your User Profile Page
You can now fill in some of your details. Your email address and more about yourself. This will appear in each one of your posts if you use an author profile in your theme.
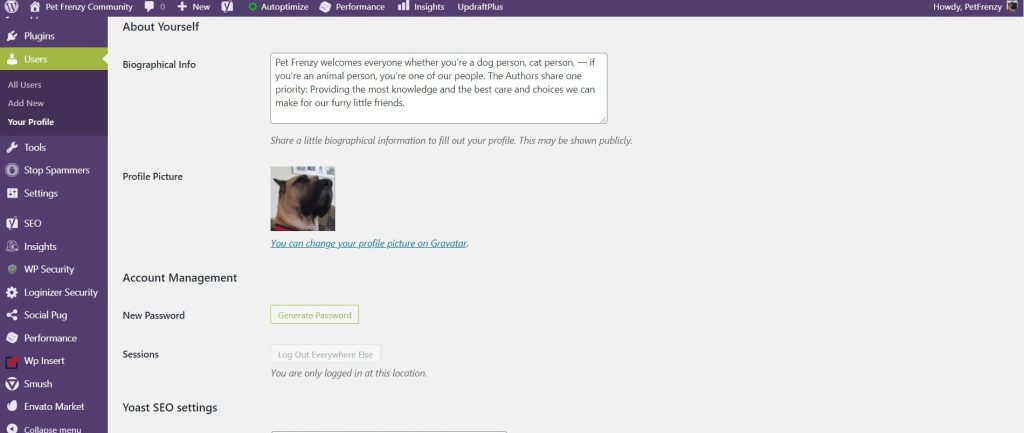
Get A Gravitar- It’s Free
As you can see I use a Gravitar. You will want to sign up for a Gravitar as soon as you can. You can go to Gravitar.com and start setting this up. Here is a video that explains exactly what one is.
You can use your logo for a gravatar if you’re trying to sell a brand. So make sure you use your business email for that gravatar.
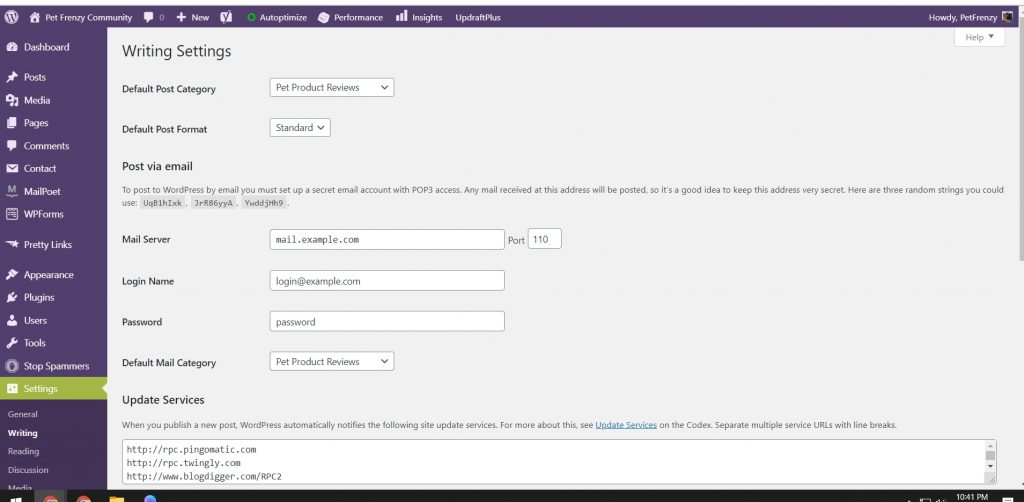
Writing Settings
One important step in setting up your WordPress is to use what we call update services. This will help people find your content on your website. It will also get your content into the search engines. Here are the steps you can take to easily update your services.
Update Services
Go to your sidebar/settings. Click on writing settings. Scroll down until you get to the update services section. You will notice by default it will only have one service. http://rpc.pingomatic.com. You will want to add to these services and I will show you exactly where to go. This is what your screen would look like.
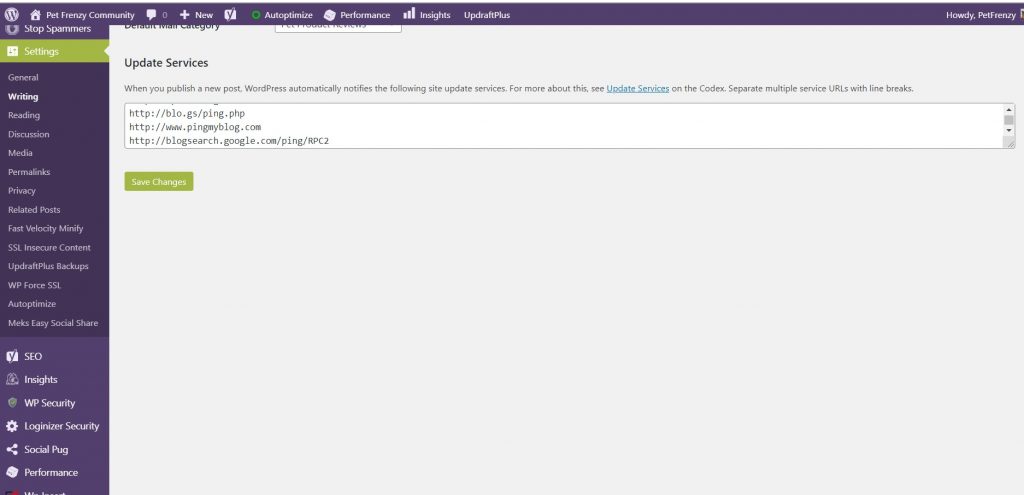
Keep this page open and open the text file I have provided for you. You can select them and paste them into the update services on your WP.
Save your changes and we can move on to your other settings. You can read more on update services in WordPress as well. I just wanted to make it easy and updated for 2020.
Reading Settings
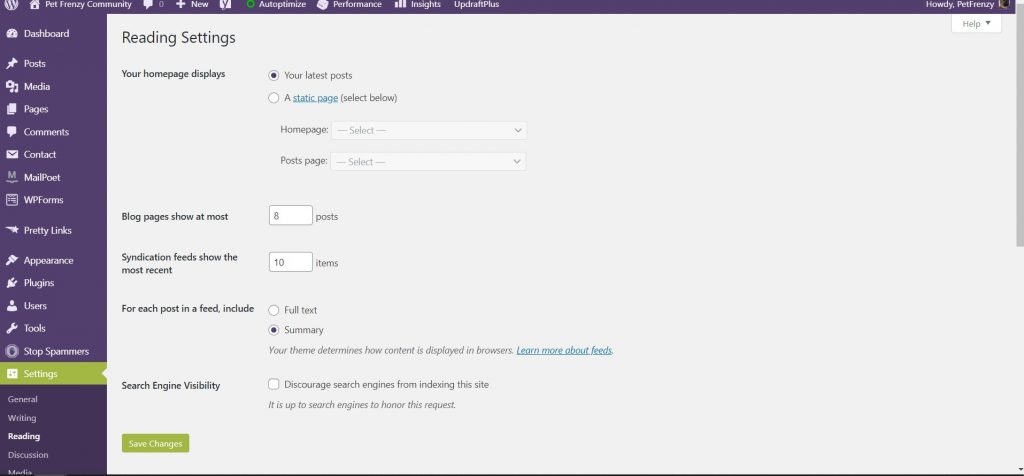
These settings can be changed at any time. I would recommend allowing search engines to index the site for exposure.
Discussion Settings
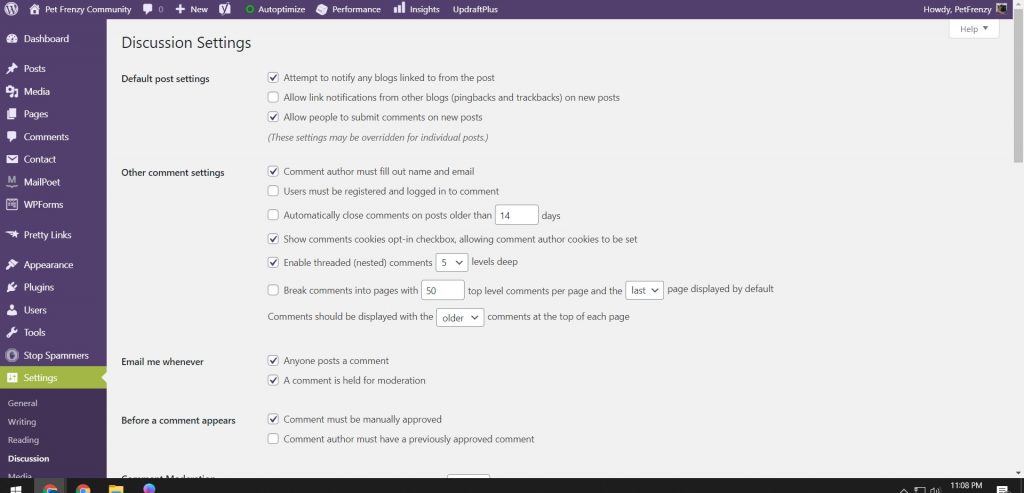
Default Article Settings
Under the default article settings, it will automatically have them all checked ok. You will want to notify any other blogs that you have linked to them because in return this is good not only for your SEO score. It is good for chances you will get a backlink from them as well in return.
However, I wouldn’t recommend allowing link notifications from other blogs unless approved. Hackers and spammers have ways to use this in their favor.
I would allow people to post comments on your posts. This can bring more people to your page. Engagement is favored by Google and other search engines. Again this will increase your SEO score which I will get into more detail later in my posts.
Other Comment Settings
This section is what your preference is for your site map. Think about when someone is leaving a comment. You will want them to leave their full name when commenting. If you are building a site that you want others to log in for memberships or other things. You will want to use this feature. If not just leave it.
You can choose when you would like to close the comments. I used 14 days after comments. That will be up to you. You can thread them, I only used 5 levels deep. Again that will be your preference. After you choose your layout you will scroll down and see this part of the screen settings.
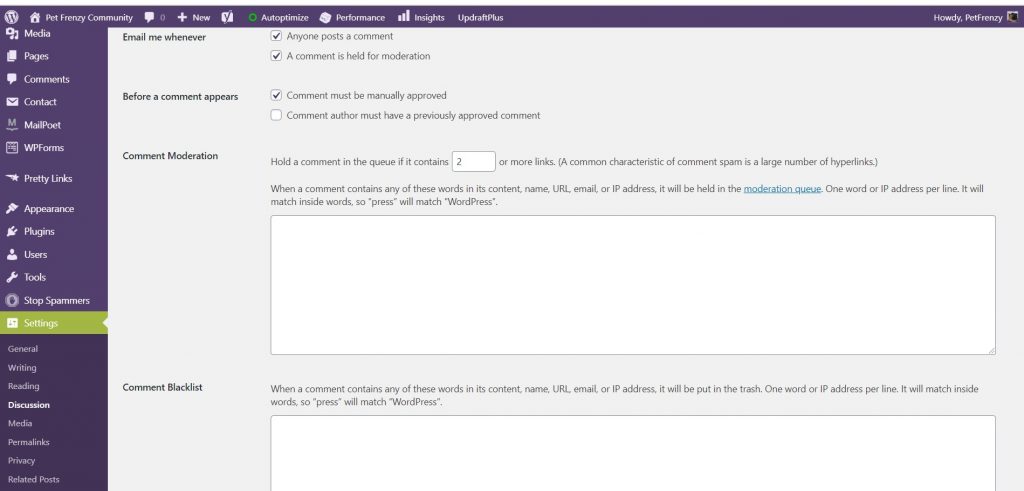
Email Me Whenever
In this setting, I chose to have both. Whenever someone posts a comment I will be notified. I can then review the comment and choose if I want to approve it.
When A Comment Appears
I chose to manually approve my comments. I didn’t need to check the second box for that reason. This just means that they need to previously be approved in order to make a comment.
Comment Moderation
I chose to hold a comment when it contains 2 links. I will want to check to make sure those links are actually related to my post. It helps keep spammers away and keep more prevalent comments.
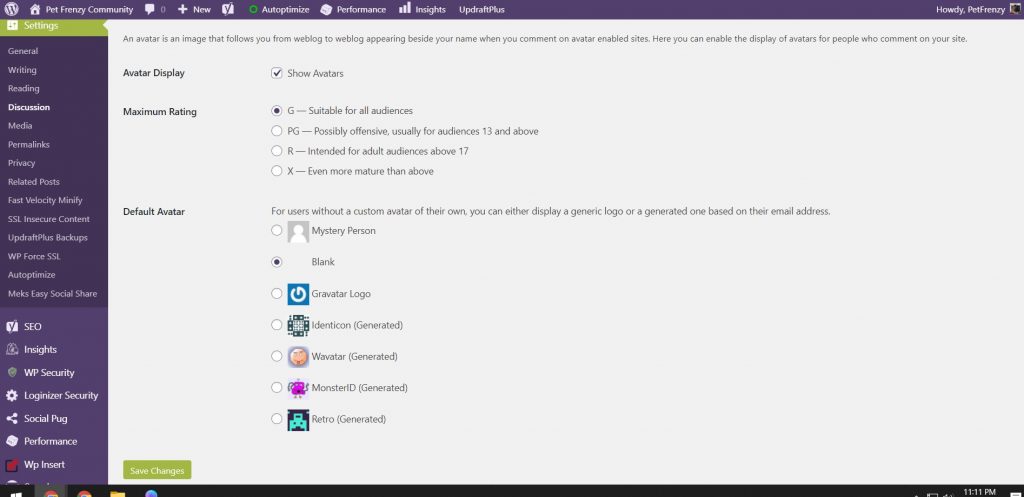
Again this will depend on your preferences. You can see I chose that if they comment and have a gravatar it will be displayed. If they do not I marked it as blank.

Permalink Settings
Permalinks are the permanent URLs to your individual pages and blog posts, as well as your category and tag. Rather than seeing a bunch of jibberish or a super long URL on your page link to your post. You will be able to see the page name, the category followed by the post name. Much cleaner and descriptive for SEO (Search Engine Optimization)
In your settings select custom structure. You will want to paste in the following: /%category%/%postname%/
Save your changes. Now when you write a post like this one for instance. Notice the URL in the link. It will read petfrenzy.ca/petbloggingtips/Learning-to-use-wordpress-for-newbies. Again this will be important for page rank when used in a search. Now that you have set this up. Each post you do will generate a permalink automatically exactly like this.
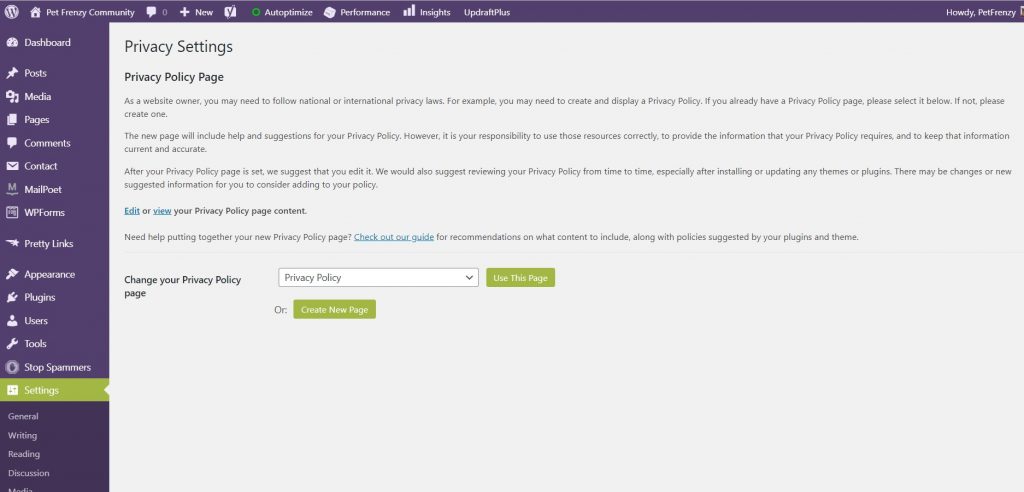
Privacy Settings
You will want to create a new page since your a new website. When you click on this you can edit and use the template the WordPress gives you. I will later show you how you can create a page for your privacy policy and then be able to use that page as I have chosen to do. This will be discussed further in my section on Creating your legal menu and pages.
Now that your settings are set up. We can move forward and learn more about WordPress Security, Plug-Ins, Widgets, Sitemaps, and Themes.

SEM Rush
*Disclosure: I only recommend products I would use myself and all opinions expressed here are our own. This post may contain affiliate links that at no additional cost to you, I may earn a small commission. Read full privacy policy here.“