Setting up your Yoast plugin and sitemap on WordPress.
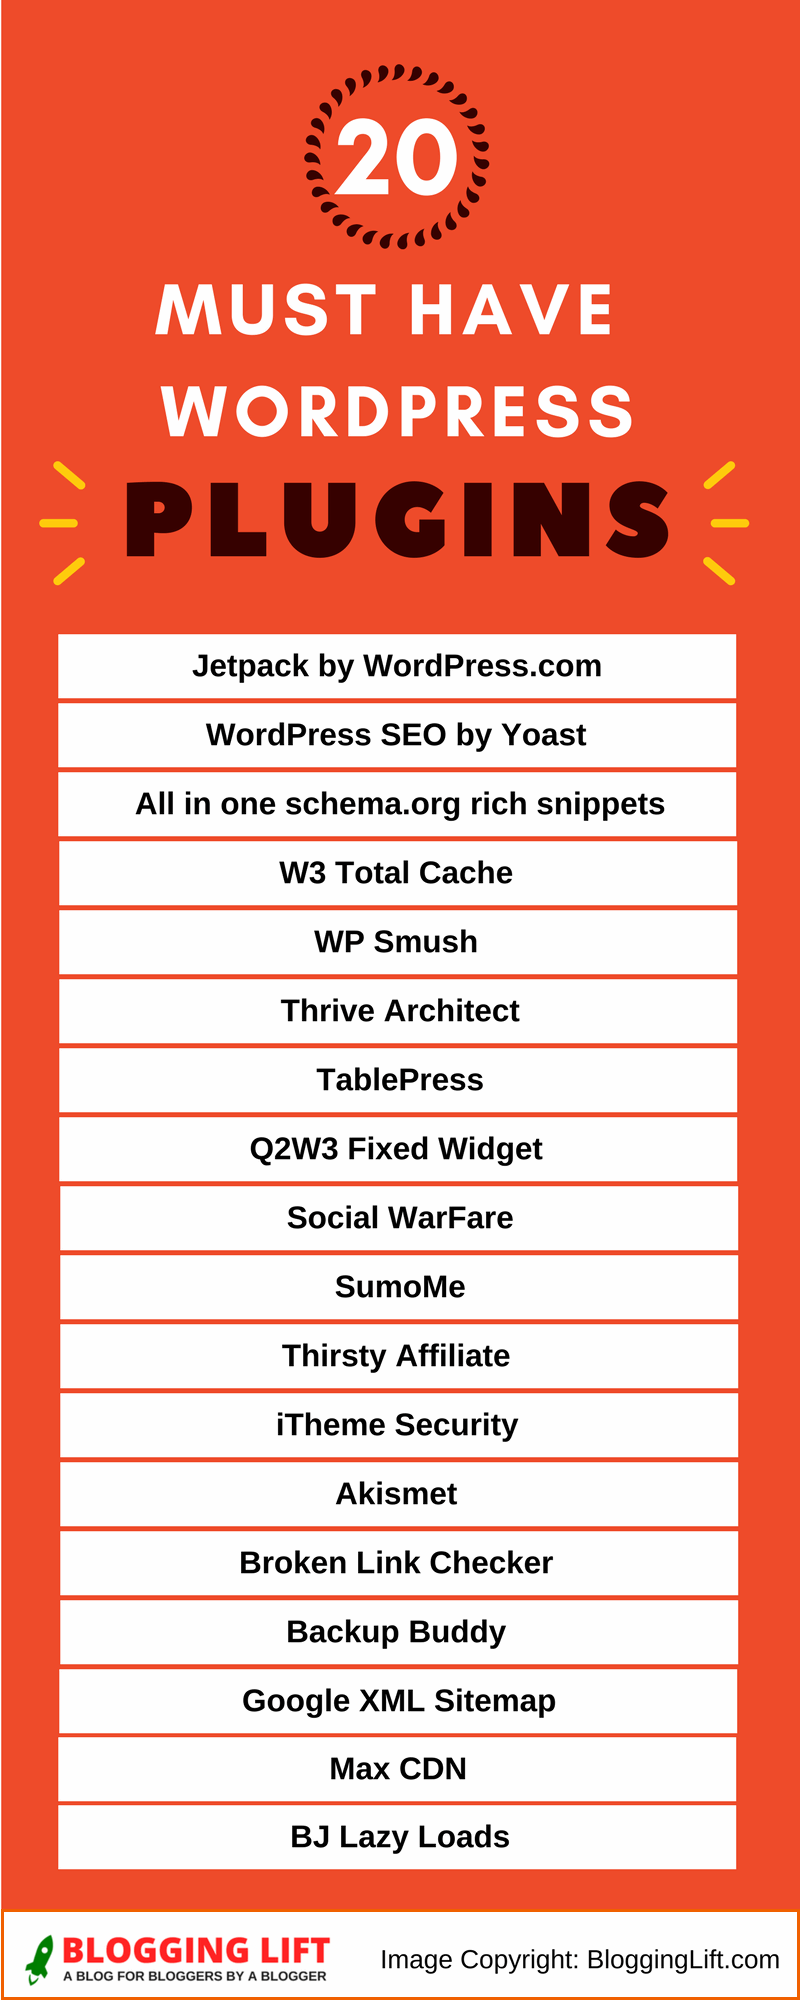
Yoast is a plugin that is commonly used. Plugins on WP are things such as forms or things that will make your site run faster and better. A Plugin is a piece of software containing a group of functions that can be added to the WordPress website. This post will show you how to Set up Yoast and create a sitemap in WordPress.
We are going to start with the basics.
Creating A Site Map With Yoast
You can add your XML site map when setting up your WordPress. This makes it so the search engines can crawl or spider your site much easier. You can do this by installing the plugin below called Yoast.
I am going to show you how you can use the plugin called Yoast. It will help your site improve your SEO – Search Engine Optimization. You will use this plugin all the time when creating an ad, or debugging facebook. It will help you increase your SEO score giving you a higher ranking.
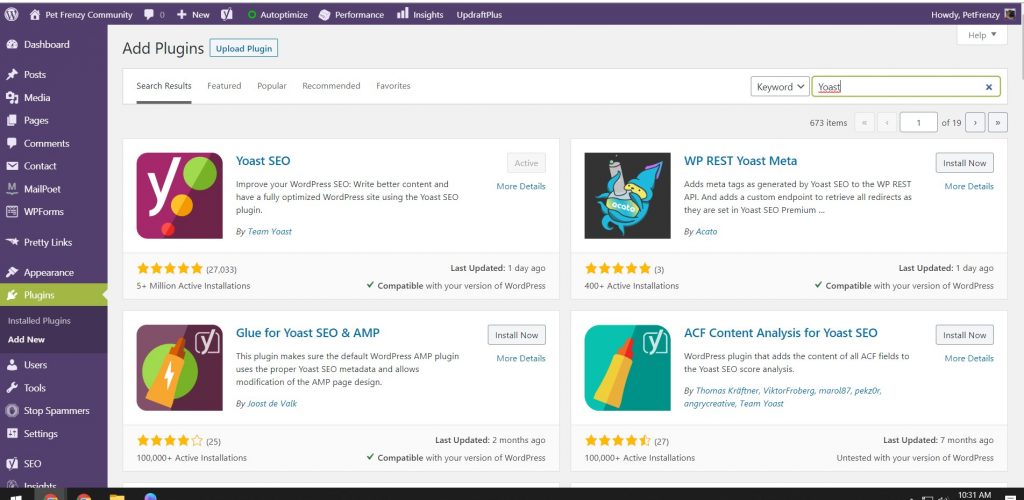
You will want to install the plugin and activate it. Once you have done that you can go to your Yoast on your sidebar. They do have a setup wizard however I am going to go through the settings so you understand what they all do.
Yoast General Settings
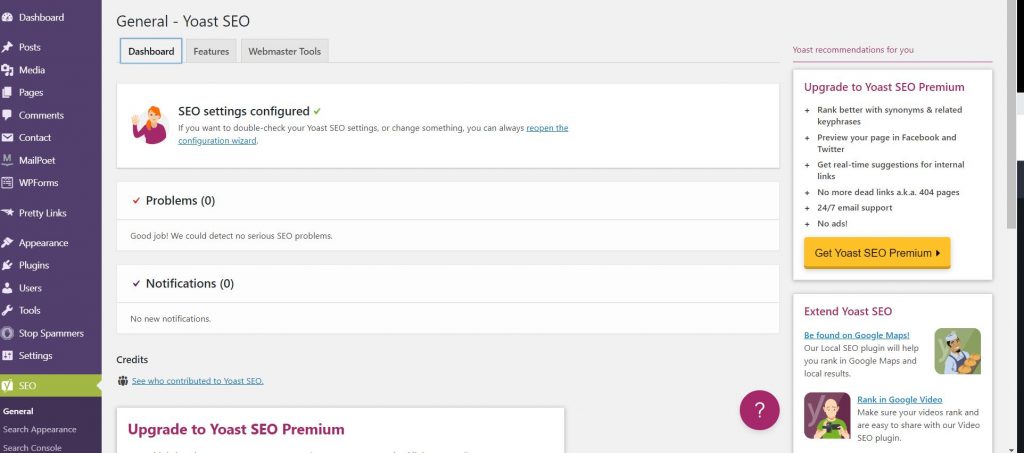
Dashboard – This is where you will see any notifications and updates you need to do. Offers to go premium. You can go premium, however, the free version works just as good.
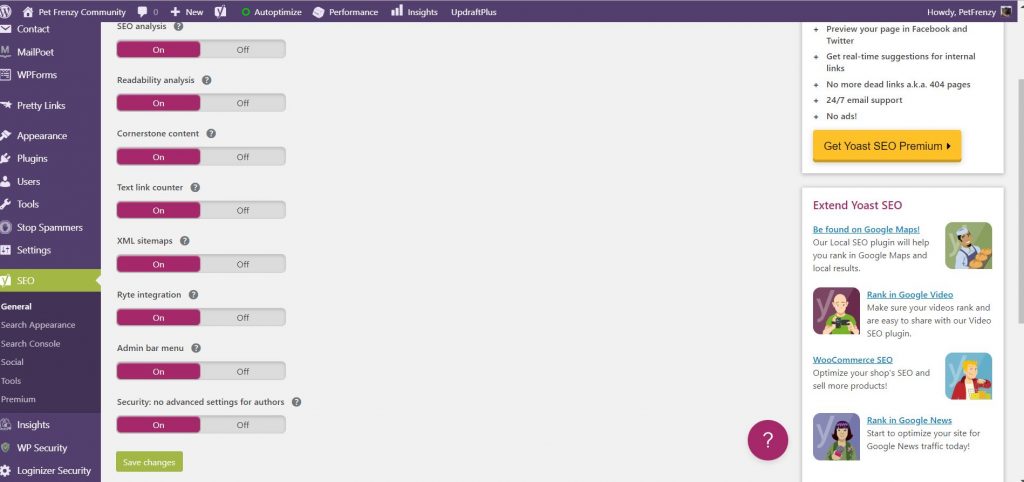
Features – I have checked all the features in my Yoast. You will notice there will be an XML Site map. If you click on the question mark (?) it will take you to the site map.
Now if you do not have a post published you may receive a 404 error. If you do than first go to your posts and create a title of your first post and a few lines. Save your post. If you’re still getting the 404 error. You will need to go to the permalinks settings again. Go to your permalinks and save changes. You do not have to make any changes.
View Your Site Map
Now you should be able to click on that link now and check your site map. You will have a few site maps. One for posts, categories, author, and page. It will create a site map for every new category or site content. If you click on the post sitemap it will give you a list of all the posts on the site. Search engines need this to index your site. If you do not have any pages you will not see the sitemaps until they are created.
I typically tend to just keep the post sitemap. I do not allow search engines to show my legal pages or other non-important pages. It can slow your page load time down as well. I will go over that further in other posts.
Search Appearance – You will have a console that will have a few different tabs.
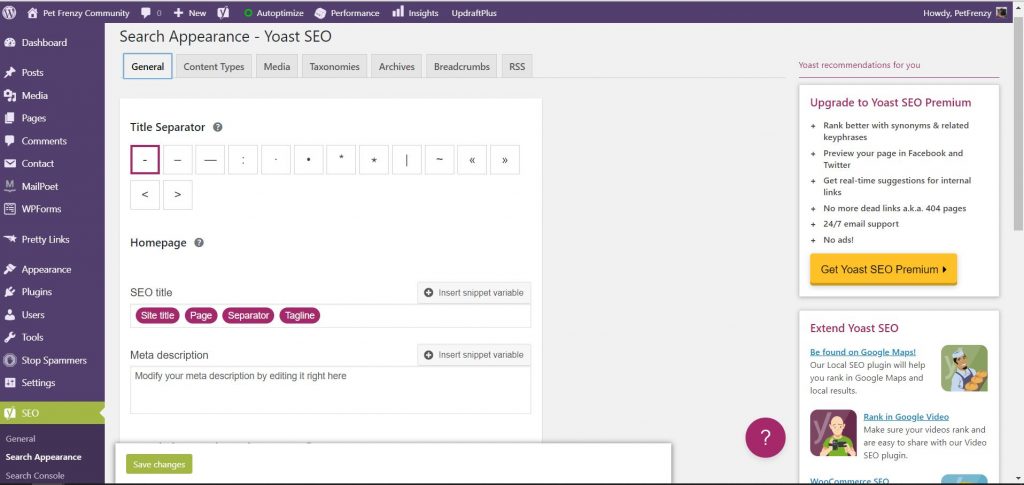
You will want to use your meta information with dashes not underscores. Here is why I have a great video you can watch on hyphens vs underscores.
Your SEO title is also important. You can follow my lead in the picture above. If you make any changes remember to save them.
Content Types Tab
This is where you can show your content in search engines. You will start by making sure all your posts can be found in the search engines. You do not have include pages like your privacy policy and so forth so you can switch that in the demo below. First, we will start with the posts. Your screen should look similar to this.
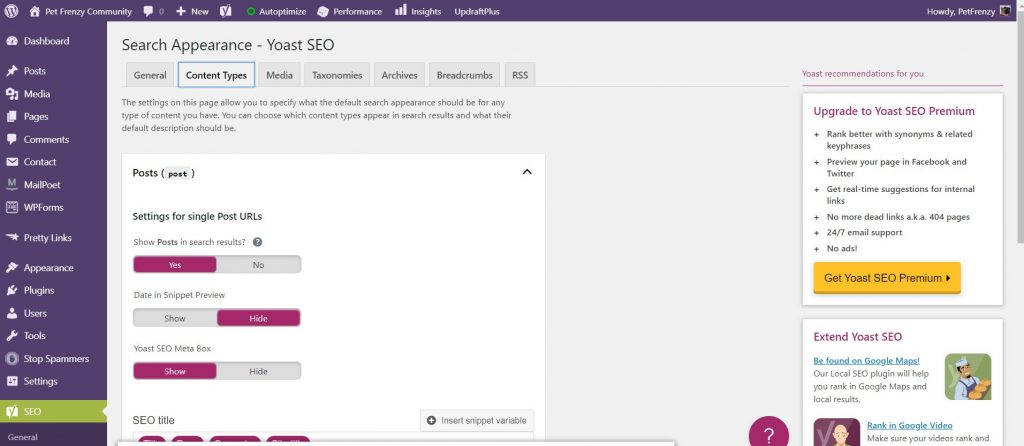
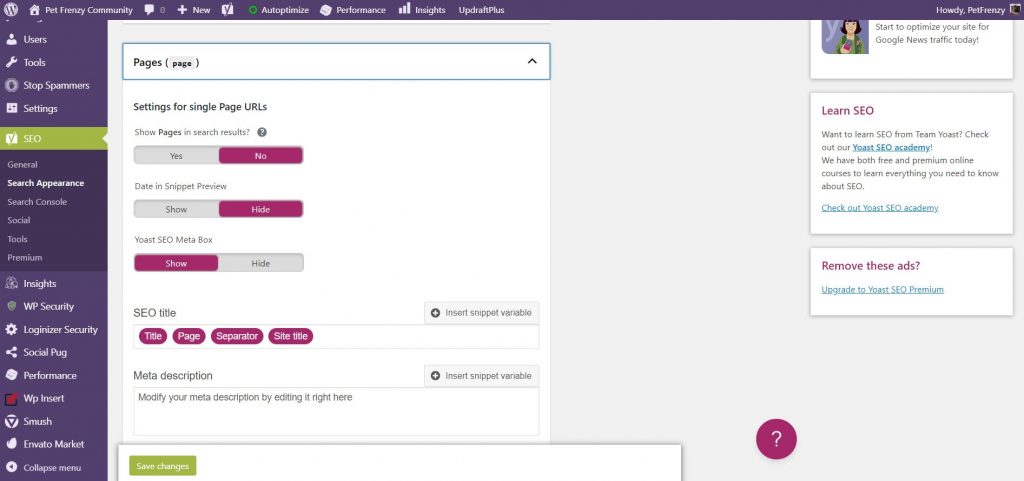
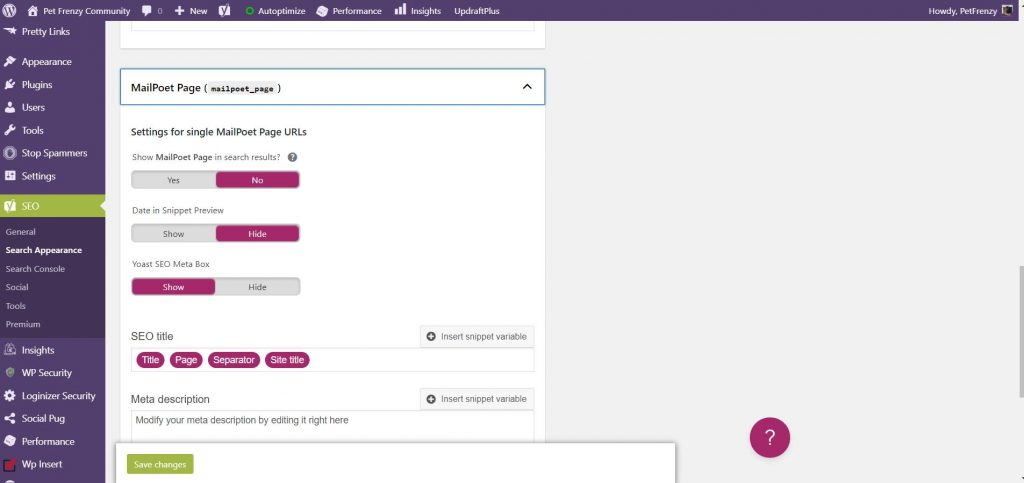
Remember to show your posts in the search results. You do not need to show your mail or pages in the search. Just the most important ones are crucial. Save your changes before moving forward.
Test Your Site Map
Go back now to the page with your site map and you will see that now you have removed the pages and mail from your XML site map. Great Job!
Taxonomies Tab – This is where you will exclude the categories or tags from the search engine results. Here are the settings I use to help increase my SEO.
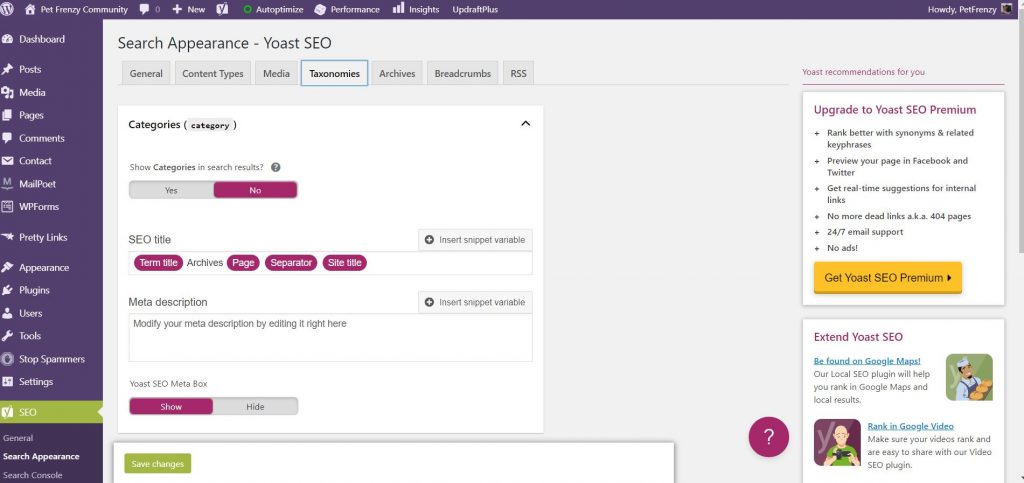
The reason I do not suggest to include the categories or tags is that it will already be in your posts. So you only need the posts. Unless you feel that you need these categories for selling products lets say. You can always change this later but for getting started. This is all you need for now.
Now you can go back and check your site map and they will be removed from your map.
Archives Tab in Search Appearance Settings – You will want to make sure that only the important stuff is included in your site search settings. Here is what you will see on the archive tab settings. I chose not to include them in my search results.
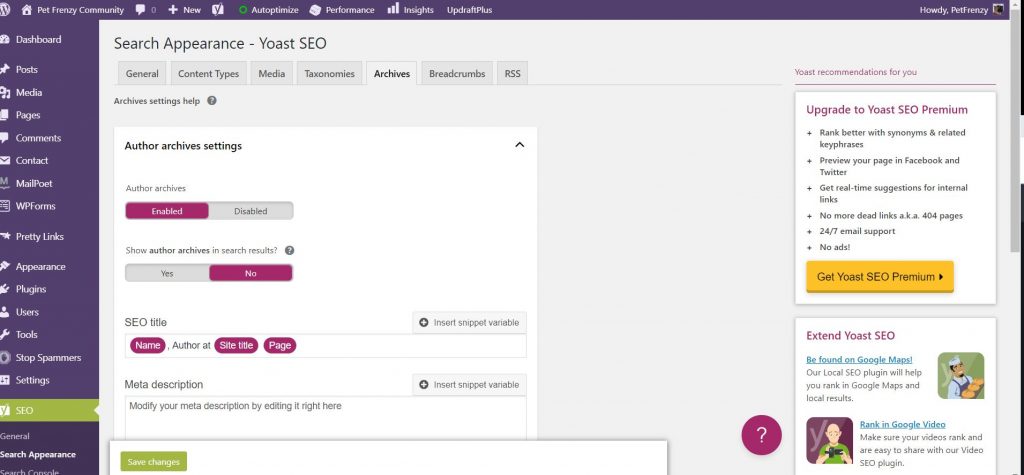
The search engines will follow the links that go to those pages in your posts. This is why internal linking is so important. So that the search engines can find the pages still without having a huge sitemap to sift through.
If you scroll down the page you can use the settings I have. It has proven to work for me very well. I will discuss why later on in my other posts.
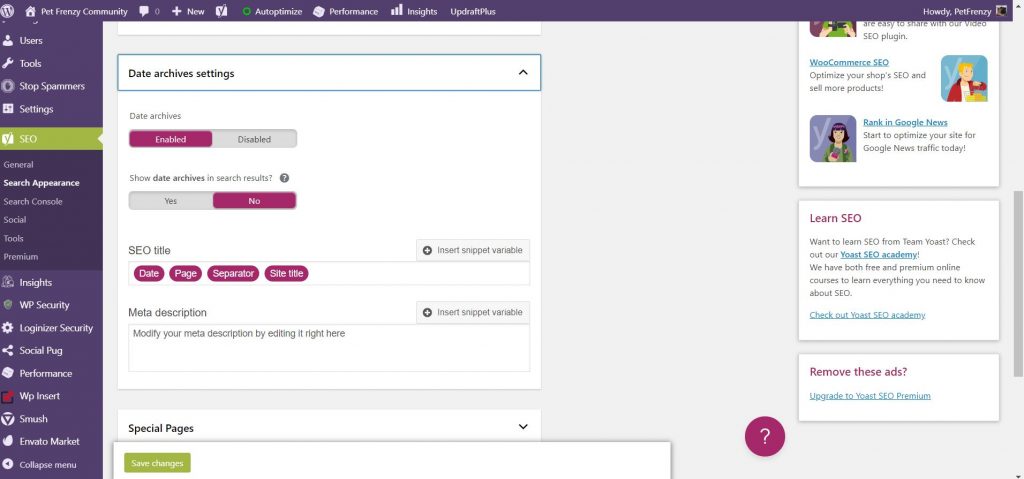
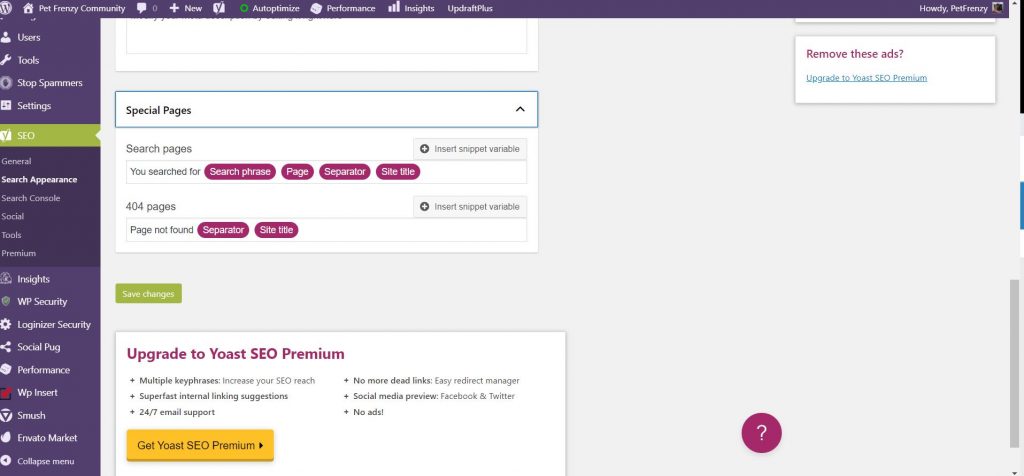
You’re Almost There
Remember once you create your pages and posts you can edit these at the bottom of each post. For example, you would just go to the page you created. Scroll down to the advanced Yoast settings at the bottom. You will then click on allow search engines to index this page. Poof Your done! The page will now be included in searches. This way your default always no follows. You only change them as you need them for each page your creating.
Congratulations your XML site map will run autopilot for you. You can find a great tutorial on Yoast for setting up your sitemap as well. If you enjoyed our article on Yoast Sitemap set up on WordPress you can read our other articles Learning WordPress for Newbies and the WordPress Security Settings.


